O-rings look simple until you have to replace one fast, and the “almost the same size” one turns into a leak, a pinch, or a repeat teardown. The frustrating part is that most sizing mistakes don’t come from bad math… they come from measuring the wrong thing (OD instead of ID + cross-section), measuring a worn ring, or mixing inch and metric sizes that are close but not correct.
In this guide, you’ll get a quick, repeatable sizing method, a standards sanity check (AS568 vs metric/JIS), the most common sizing mistakes that cause repeat failures, and a field tip on when kits are fine vs when you need the exact spec so you can match the right O-ring with confidence the first time.
Key Takeaways
Measure ID + cross-section (CS), OD is misleading for sizing.
Confirm inch (AS568) vs metric/JIS before ordering.
If the “right size” still leaks, check the gland/groove, and measure an unworn ring if possible before guessing a new size.
The only two dimensions you need
O-rings don’t size like washers or gaskets; what matters isn’t how big it looks on the bench, but how it fits in the groove and how much it gets squeezed in service.
That’s why there are only two measurements you need to identify an O-ring correctly, and everything else (including OD) is secondary or misleading.
ID (Inner Diameter)
The ID is the “name” of the O-ring it tells you what diameter the ring is meant to fit around (a bore, a boss, a piston, etc.). It’s the measurement most standards and size charts use as the starting point because the ID stays meaningful across different fits and applications.
CS (Cross-Section)
The cross-section (CS) is the thickness of the O-ring “cord.” This is the dimension that controls squeeze in the gland, which is why small CS differences matter: a slightly thicker or thinner ring can change sealing force, friction, and extrusion risk even if the ID is “close.”
Don’t size from OD, outer diameter changes easily with stretch, compression, and flattening, so it’s not a reliable identifier.
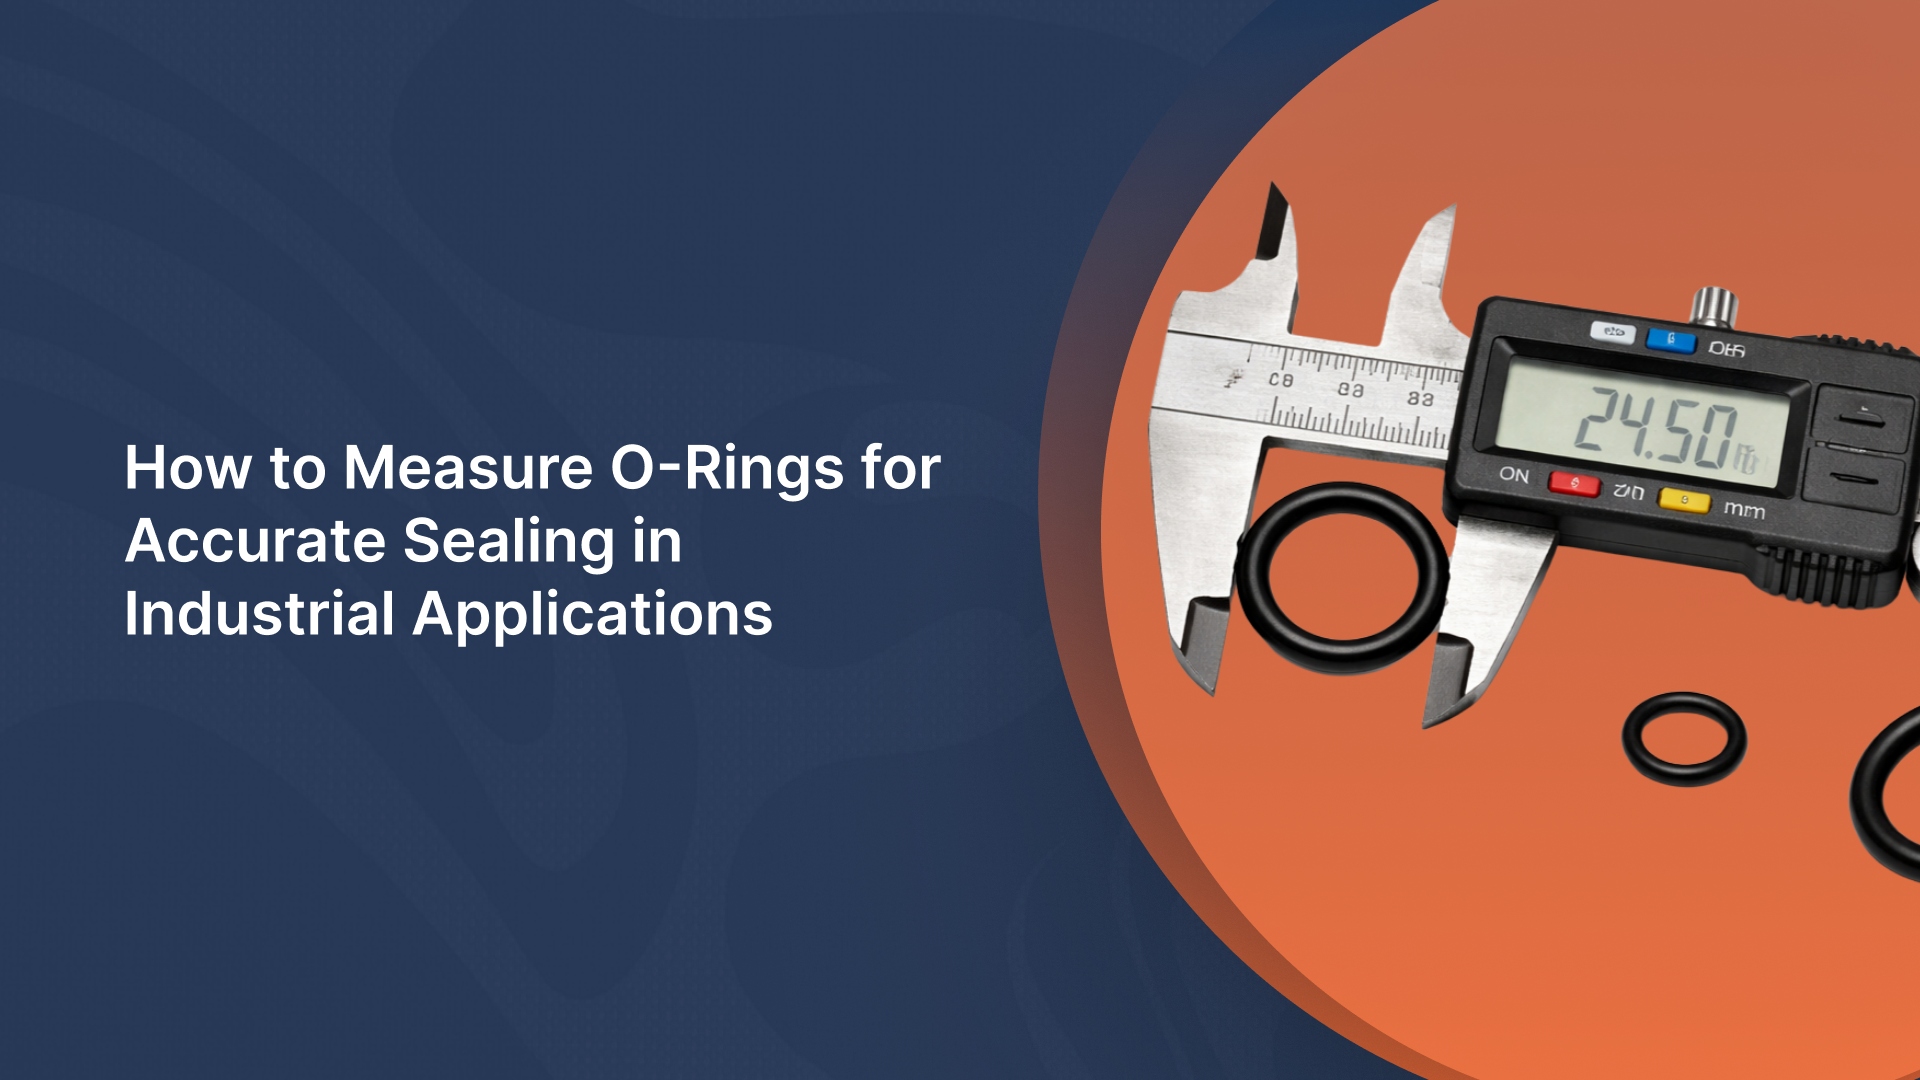
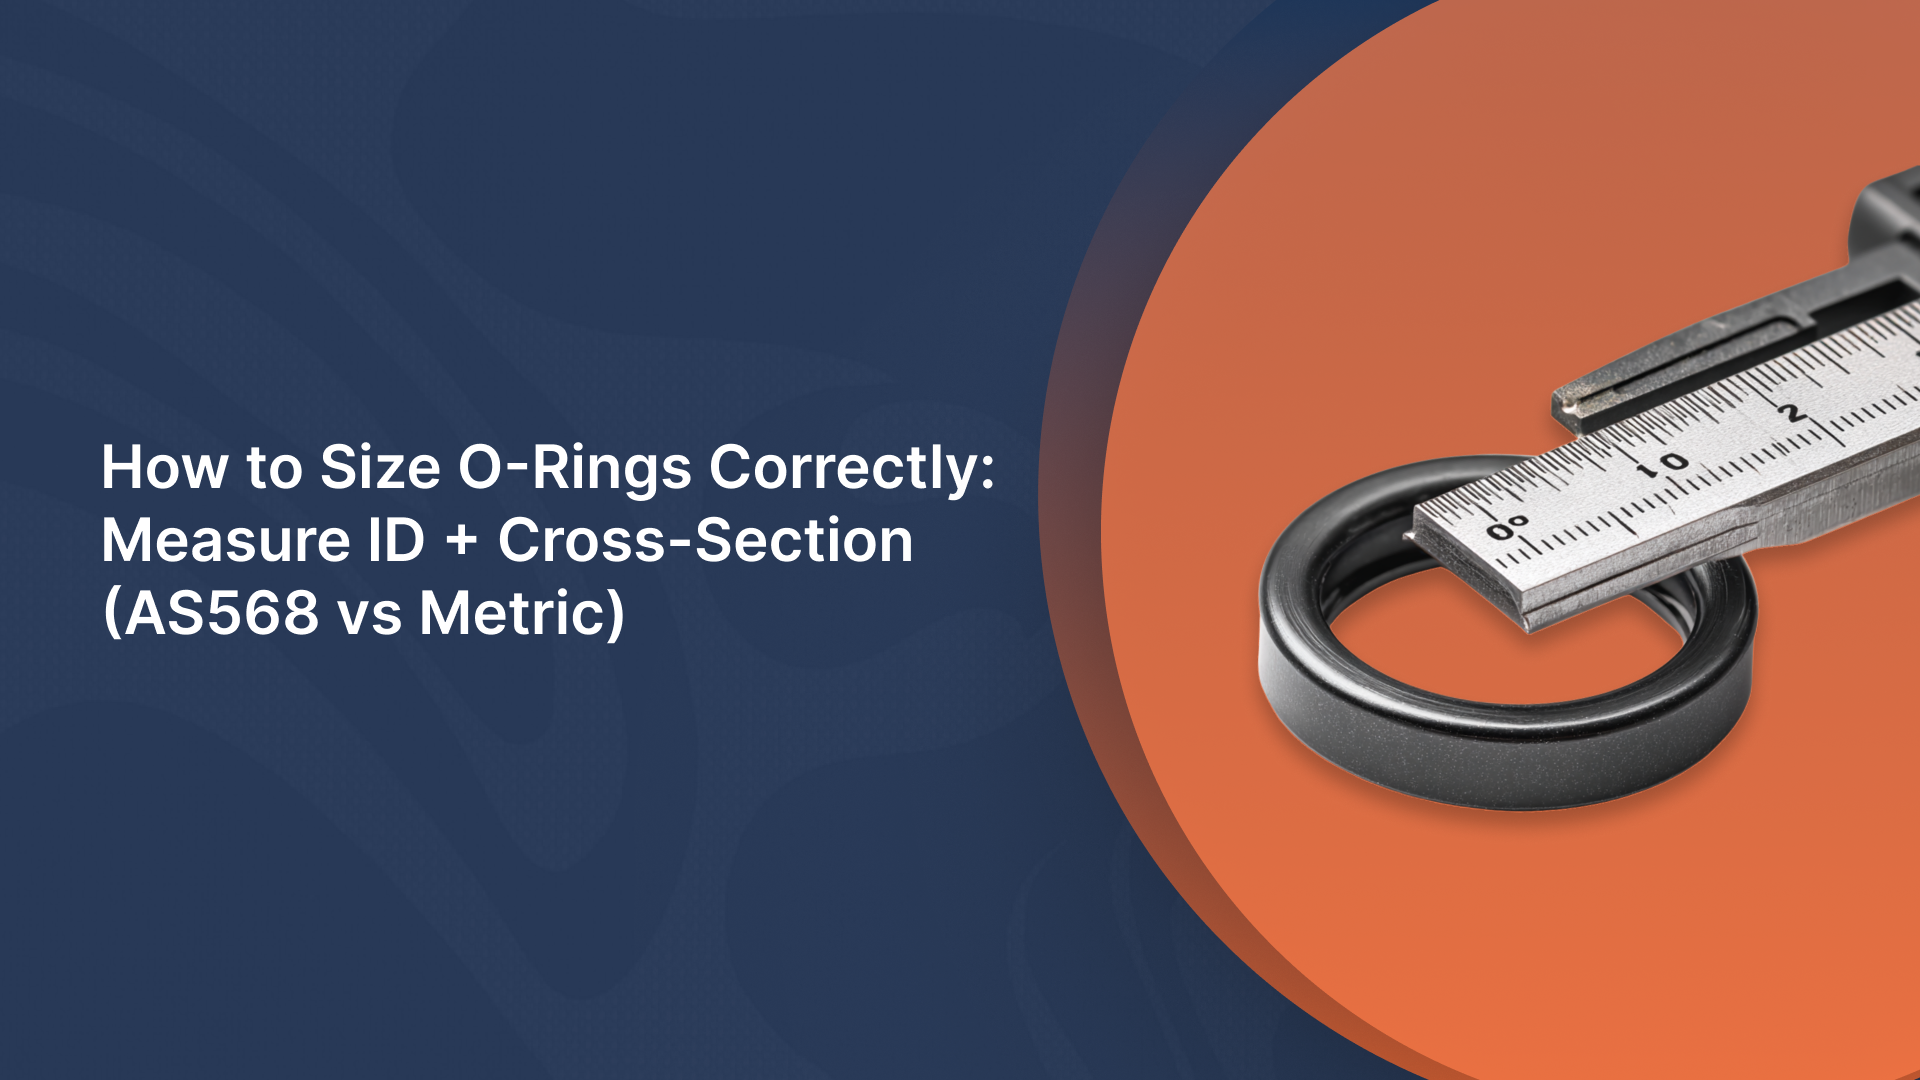
How to measure an O-ring accurately
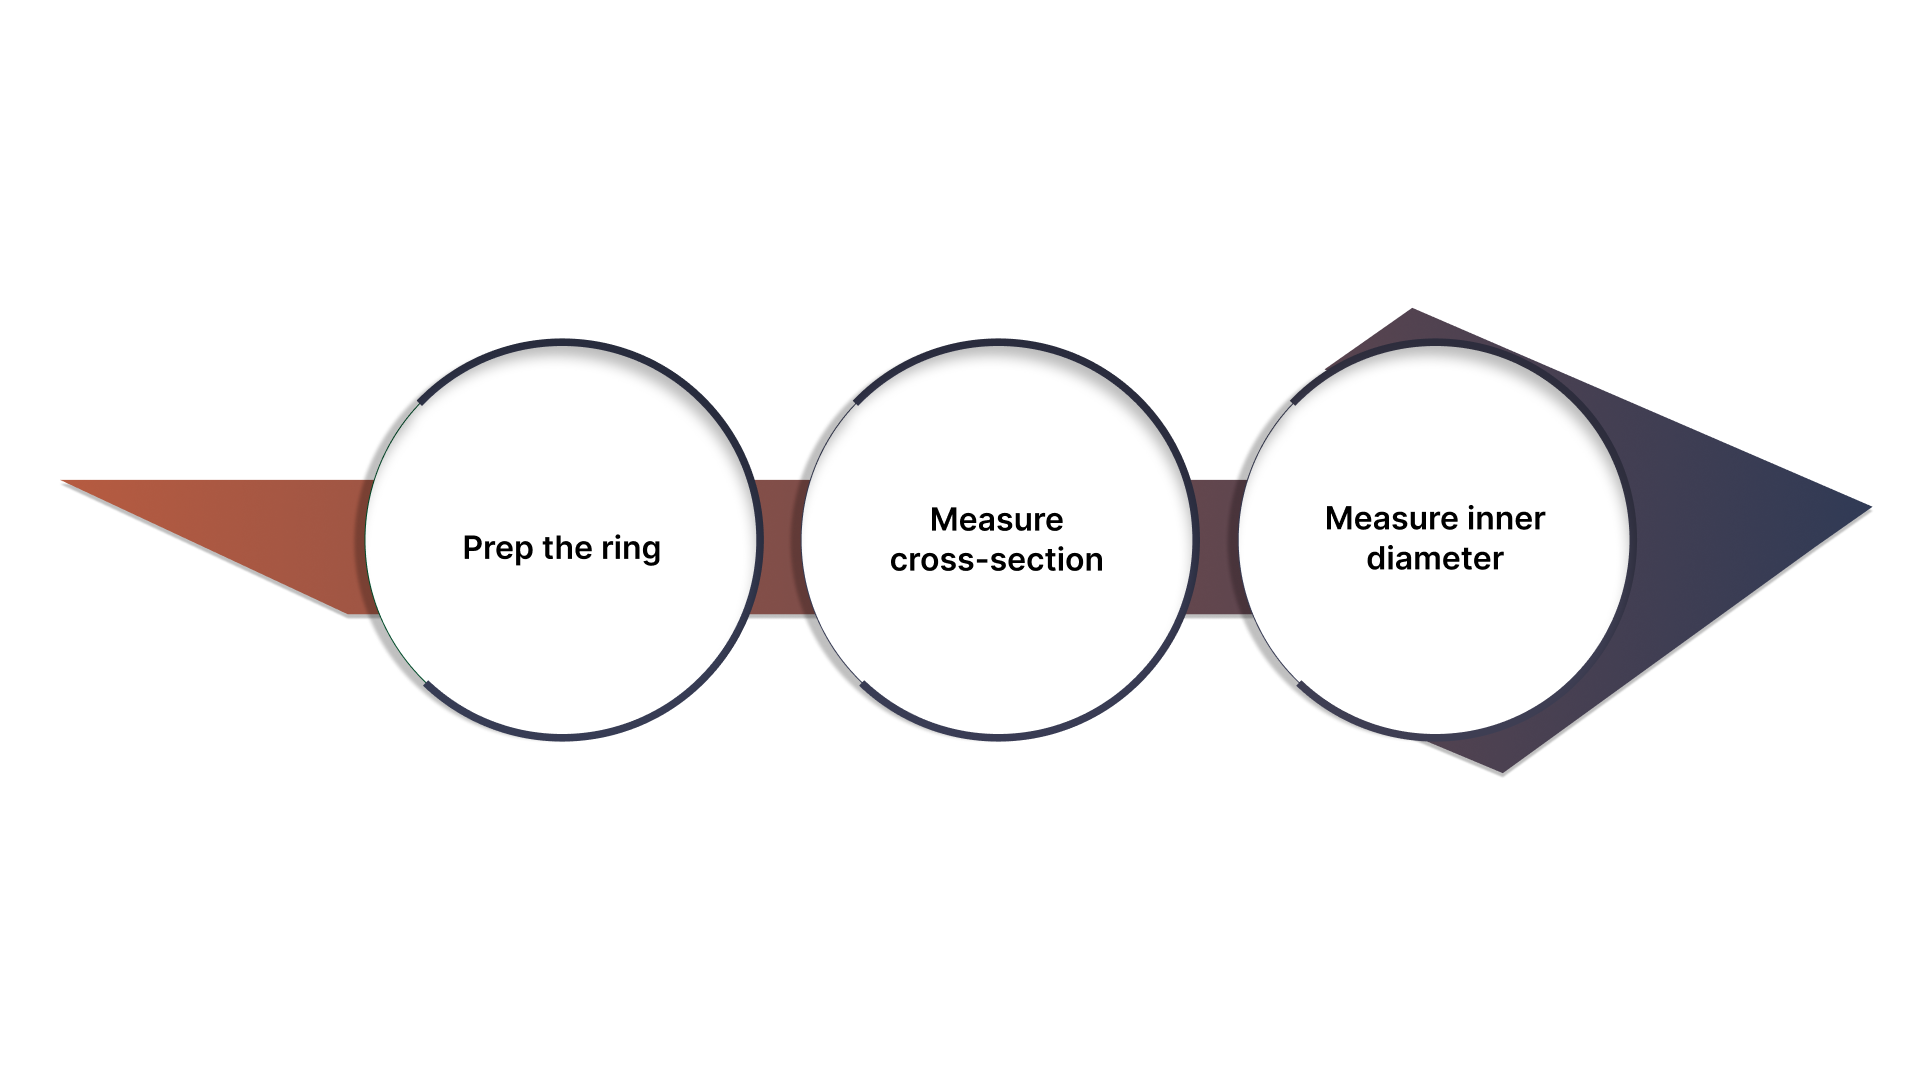
Measuring an O-ring sounds simple until the part you pulled out is swollen, flattened, or slightly oval. Use this quick caliper method to get repeatable ID + cross-section measurements without accidentally stretching the ring and skewing the result.
Step 1: Prep the ring (so you don’t measure “damage”)
Clean it (wipe off oil/grit) so the caliper jaws sit flat.
Let it relax on a table for a minute, don’t hold it stretched.
Don’t pull on it to “see the size.” Even light stretch changes ID and can make the cross-section read smaller.
Step 2: Measure cross-section (CS) the right way
Use the calipers to measure the thickness of the cord (the round “body” of the O-ring), not the overall outside size.
Take 3–4 readings around the ring (rotate and re-measure). Use the largest consistent value if it varies slightly.
If the ring is flattened (compression set), don’t measure the flat.
Measure across the least-flattened area (often the “corner” of the ring).
If it’s badly flattened, treat CS as unreliable and move to groove/drawing or a known standard cross-section family.
Step 3: Measure inner diameter (ID) without ovaling it
Lay the ring flat. Use the calipers’ inside jaws to measure the inside opening.
Don’t spread the jaws to the point that the ring deforms into an oval. Use just enough contact to touch the inner edges.
Take two readings: one across the smallest axis and one across the largest. If they’re different, the ring is oval. Use the average only if the difference is small; otherwise, treat it as worn/distorted.
If the old ring is distorted or worn
Best option: measure the groove (gland) or use the drawing/spec that’s the real sizing reference.
Practical fallback: match the CS to common standard families (you’ll usually find it’s close to a standard CS), then choose the ID from a standard size list that fits the groove/application.
Once you have CS you trust and an ID that isn’t distorted by stretching/ovaling, you can reliably match the ring to standard sizes, without guessing from OD.
Identify the size system before you buy (AS568 vs metric)
Before you order anything, confirm whether the O-ring is an AS568 (inch-series) size or a metric/JIS size. Most “almost fits” leaks originate from inch/metric near-misses that appear close on the bench but fail to seal correctly in the gland.
Why “close” sizes fail (inch/metric near-misses)
A small CS difference changes the squeeze. Too much squeeze = assembly damage/friction; too little = leakage and early set.
“Close ID” can still overstretch or underfill. Overstretch thins the cross-section; underfill can roll or shift in dynamic use.
The gland was designed around a standard. If the groove expects an AS568 cross-section and you drop in a “nearby” metric CS, the seal geometry is wrong even if OD looks similar.
Quick clues to tell which system you’re in
Equipment origin:
U.S.-built legacy equipment often leans toward AS568.
Many global/OEM/import systems lean metric/JIS.
Documentation cues:
Any reference to AS568 dash numbers (e.g., -214) = inch-series.
Any callout like “x.xx mm CS” or a part number tied to JIS = metric.
Cross-section “family” feel:
If your CS measures cleanly to a common inch fraction/typical chart value (without rounding gymnastics), it’s often AS568.
If it lands cleanly on a whole/half-mm style value, it’s often metric.
Practical rule
Take your measured ID + CS and try matching to both systems using standard size charts.
Choose the size that lands on a true standard match (tight match on ID and CS), not the one whose OD “looks closest.”
If neither system matches well, assume you’re dealing with wear/swelling or a non-standard gland, and switch to groove/drawing-based verification before buying.
Once you’ve identified the size system, the rest of the sizing becomes straightforward, because you’re matching to the standard the hardware was actually designed around.
Turn measurements into an orderable size
Once you’ve got ID + cross-section (CS) and you know whether it’s inch (AS568) or metric, the last step is turning those numbers into a size you can actually buy without guesswork.
If it’s AS568 (inch), how do you end up with a dash size
AS568 sizes are ordered by “dash numbers” (e.g., -214) that correspond to a specific ID + CS combination.
Your workflow is simply:
Match your measured CS to the closest standard AS568 cross-section family
Then match your ID within that same family to the closest standard ID
The chart gives you the dash size (that’s what you put on the PO/RFQ)
Keep it simple: you’re not “calculating” a dash number, you’re matching to the standard chart.
If it’s metric: how it’s typically specified
Metric O-rings are usually specified as:
ID × CS (both in mm)
Example format: 20 mm × 2.5 mm
You’ll often also see a standard reference (e.g., metric series or JIS), but the orderable core is still ID and CS in millimeters.
If you’re uncertain: what to send a supplier (so they can match it fast)
Send a short message with only what matters:
Measured ID + CS (and units)
Likely system: “Looks inch/AS568” or “Looks metric/JIS” (if you have a hunch)
Application basics: static vs dynamic, media, temperature, pressure (if known)
Any reference you have: equipment model, old dash number, drawing, or gland dimensions
If you can provide ID + CS + size system, you can usually get to a correct, orderable size quickly and avoid the classic “close enough” mis-order.
Sizing mistakes that cause wrong orders (and the quick fix)
At this point, you should have two trustworthy measurements (ID + CS), and you’ve sanity-checked whether you’re in AS568 (inch) or metric/JIS. The mistakes below are the ones that still slip through, and they’re exactly why people end up with “it looked right on the bench” failures.
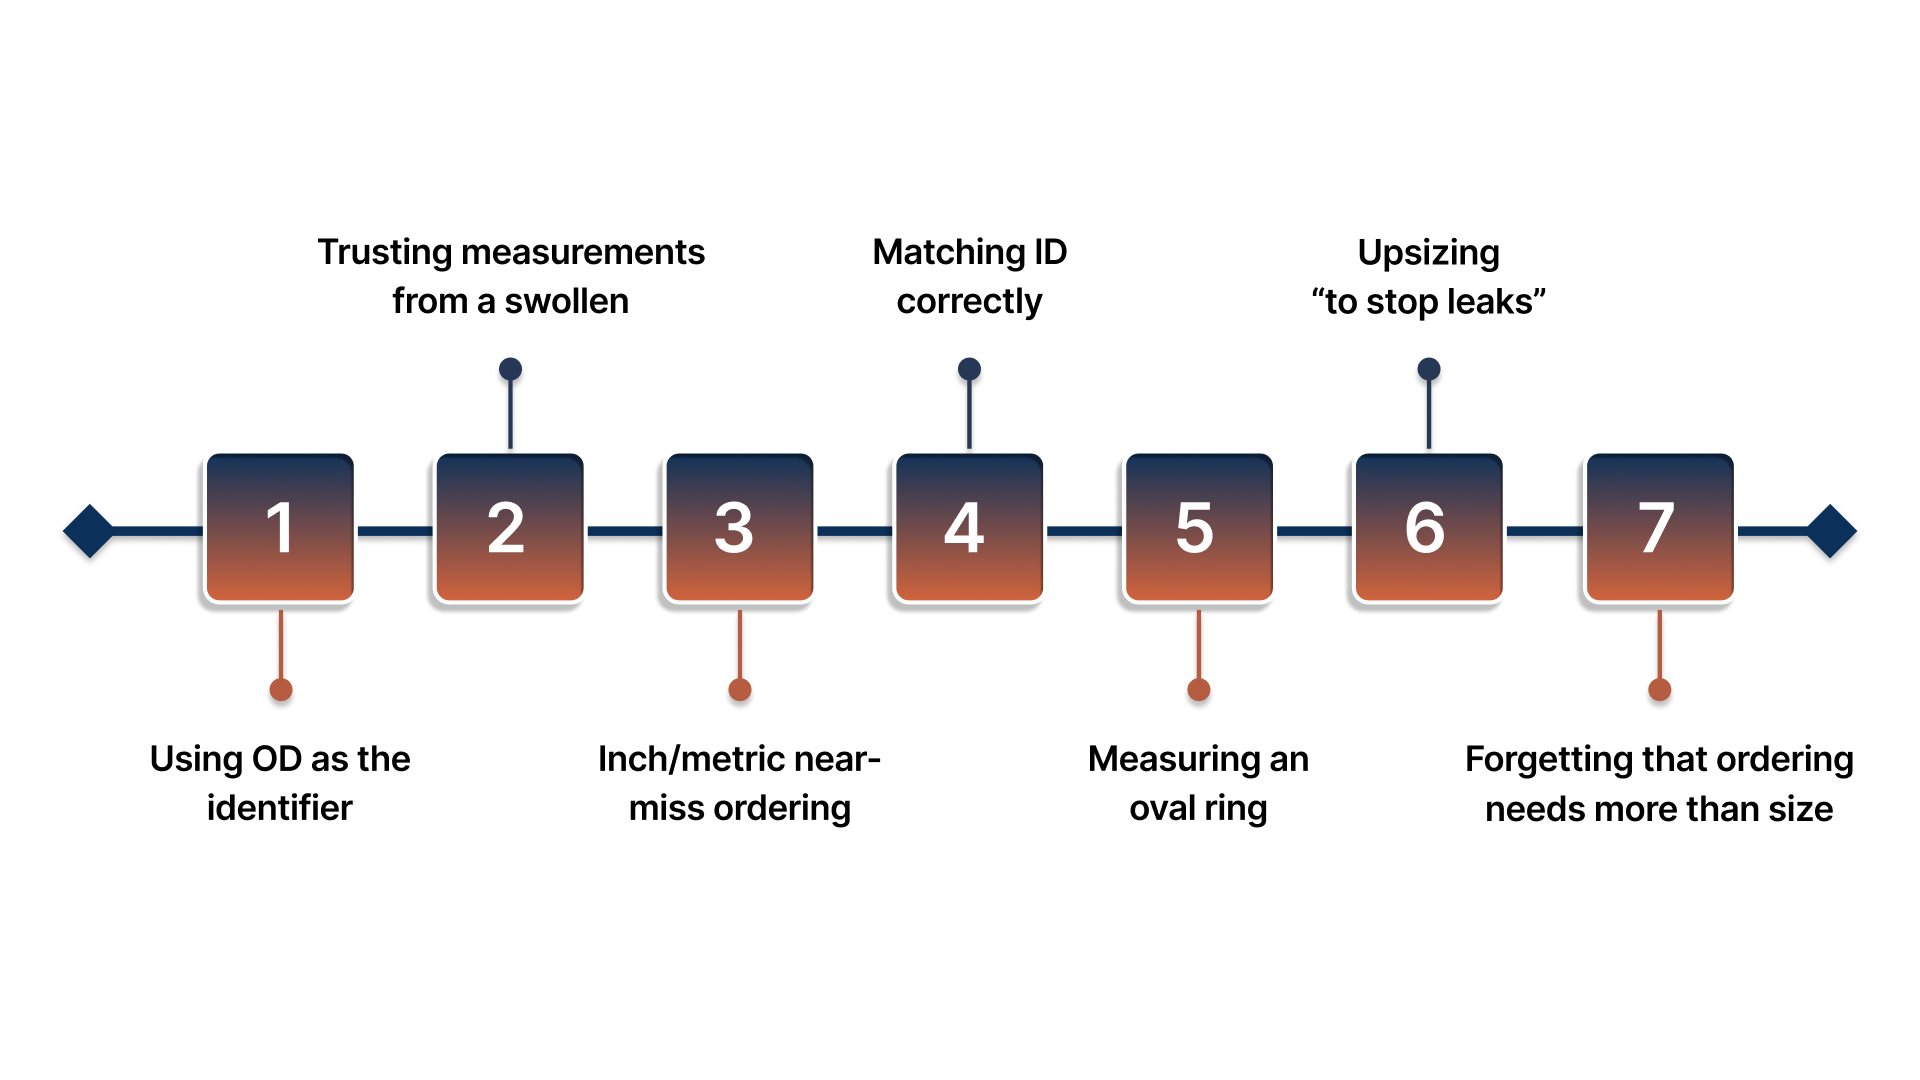
Mistake: Using OD as the identifier
OD is the easiest number to grab—and the least useful. It changes with stretch, compression, and how the ring was stored/removed.
Quick fix: Always size from ID + CS. If you only have OD from a quick glance, stop and re-measure properly.
Mistake: Trusting measurements from a swollen, heat-aged, or flattened ring
If the old ring lived in oil/fuel/solvent, saw heat, or has compression set, you’re measuring the failure, not the original size.
Quick fix:
If the ring is clearly distorted, don’t “correct” the size by guessing bigger/smaller.
Instead, lock CS to the nearest standard CS family, then use a gland/drawing (best) or a standard chart to pick the matching ID.
Mistake: Inch/metric near-miss ordering (“close enough”)
This is the classic: the ID looks fine, but CS is off just enough to change squeeze and leak life.
Quick fix: Match your ID + CS to a true standard in one system. If you have to “round hard” to make it fit, you’re probably in the wrong system.
Mistake: Matching ID correctly but grabbing the wrong CS family
Most sealing problems from “wrong size” are really wrong CS. A small CS change shifts the squeeze, friction, and extrusion risk.
Quick fix: Treat CS as the anchor: pick the correct CS family first, then choose the ID within that family.
Mistake: Measuring an oval ring and ordering the wrong ID
Old rings can oval from removal, long-term compression, or mishandling. Ordering off the wrong axis is how you end up overstretching (thin CS) or underfilling (roll/shift).
Quick fix: Take two ID readings (min/max).
If they’re close, use the consistent value.
If they’re noticeably different, assume distortion and switch to a gland/drawing or a standard size match approach.
Mistake: Upsizing “to stop leaks” without checking the hardware
Bigger isn’t automatically better: oversize can cause pinching, assembly cuts, or too much squeeze; undersize can roll or move in service.
Quick fix: Only change size when you have a clear reason (wrong standard, wrong CS family, clear underfill/overstretch). Otherwise, keep the size and verify fit in the groove/application.
Mistake: Forgetting that ordering needs more than size
Two rings with the same ID + CS can behave completely differently in service if the material/hardness is wrong.
Quick fix: On every order, include material/compound and durometer if your application is anything beyond “generic static seal,” especially for heat, chemicals, or dynamic motion.
Bottom line: If you lock ID + CS, confirm inch vs metric, and refuse to measure a failed ring as if it’s “truth,” you eliminate most wrong orders before they happen.
When an O-ring kit is OK vs when you need the exact size
O-ring kits are built for speed, not certainty. They’re a smart move when the application is forgiving, and you can verify the fit immediately. But if the seal is tied to pressure spikes, motion, temperature swings, or uptime, “close enough” becomes a repeat-failure cycle—so you want the exact size/spec.
An O-ring kit is OK when:
It’s static (no sliding or rotation).
Pressure is low to moderate, and spikes aren’t part of the story.
You’re replacing common fittings/ports where standard sizes are expected.
You can test fit immediately (assembles cleanly, no pinch, no visible gap, seals on first assembly).
You’re not guessing blind you can still confirm ID + CS (or you know the standard size you’re aiming for).
You need the exact size/spec when:
There’s dynamic motion (reciprocating or rotary), where near-misses increase wear, rolling/twist, and leakage.
The system sees high pressure or pressure spikes (extrusion/blowout risk rises fast with clearance + near-misses).
Media includes fuels/solvents/cleaners/CIP, or the exposure list is mixed/uncertain.
Temperatures include high heat, low-temp startups, or thermal cycling (set and leakage show up later).
The gland is unknown/non-standard, or there’s a history of repeat leaks.
It’s tied to safety, compliance, or uptime, where a re-teardown is expensive.
Rule of thumb: If you can’t confidently verify ID + CS + the size system (AS568 vs metric/JIS), treat a kit as a temporary stopgap, not the final spec.
When you need the exact size (or the old ring is too distorted to trust), the fastest path is to confirm the standard match from ID + CS or use gland/drawing details instead of guessing.
Where Detroit Sealing Components fits
Once you have ID + cross-section (CS), sizing becomes a standard-matching and fit-validation problem, not a guessing problem. DSC supports the two parts that cause most wrong replacements: confirming the right standard size and catching cases where the seal fails for reasons other than size.
Confirm the correct standard size (AS568 vs metric/JIS)
DSC can help match your measured ID + CS to a true standard size (instead of an “OD looks close” near-miss), so you order a size the groove was actually designed around.
Validate the fit when “the right size” still doesn’t work
If a replacement leaks, pinches, or wears fast, the issue is often groove squeeze, clearance/extrusion gap, edge condition, or installation damage. Sharing gland details or a drawing helps confirm whether the geometry supports the seal you’re trying to run.
Provide the right next step when sizing isn’t the fix
When the failure driver is motion, spikes, or extrusion, not size, DSC can support options beyond a standard O-ring, including X-rings/quad-rings (dynamic stability), back-up rings (extrusion control), and hydraulic/dynamic seals (higher-duty motion).
Send ID + CS (and units) or a drawing/gland dimensions, plus motion type, pressure/spikes, and media + temperature, and Detroit Sealing Components can help confirm the correct standard size and sealing approach.
Conclusion
O-ring sizing is simple when you keep it disciplined: identify the ring by ID + cross-section, confirm inch vs metric/JIS, then convert that into a standard, orderable size instead of eyeballing OD.
If a “correct” size still doesn’t behave, treat it as a fit-and-duty check (groove, clearance, motion, pressure spikes, installation) rather than ordering the next closest size and repeating the same failure.
FAQs
How do I measure an O-ring size?
Measure ID (inner diameter) and CS (cross-section thickness) with calipers. Take a few readings around the ring and avoid stretching it while measuring.
Do I measure ID or OD?
ID + CS. OD changes with stretch, squeeze, and flattening, so it’s not a reliable identifier for sizing.
What is cross-section (CS)?
CS is the thickness of the O-ring “cord.” It’s the dimension that controls the squeeze in the groove, so small CS differences can cause leaks, high friction, or extrusion.
How do I know if it’s metric or AS568?
Match your measured ID + CS against both systems’ standard charts and pick the true standard match (not the closest-looking OD). Dash numbers (e.g., -214) usually indicate AS568.
Can I measure a used O-ring to reorder it?
Sometimes, but used rings can be swollen, flattened, or oval, which throws measurements off. If it’s distorted, use the groove/drawing (best) or match CS to a standard family and then select the closest standard ID.